
Why Gorilla Photography Is a Genuine Technical Challenge
Few wildlife photography scenarios combine as many difficult conditions at once as a gorilla encounter. The forest canopy filters out most direct sunlight, gorillas often rest in the darkest, most shaded pockets of vegetation, flash photography is strictly prohibited to avoid startling the animals, and you have only one hour to work with once you finally locate the family. Getting the best camera settings for low-light gorilla photography sorted out before you ever reach the forest, rather than fumbling with menus once a silverback is sitting twenty feet away, makes an enormous difference to how many usable images you bring home from what is, for most photographers, a genuinely once-in-a-lifetime opportunity.
Understanding the Light You Will Actually Face
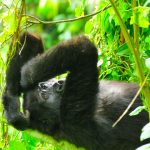
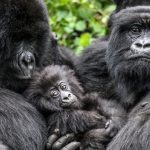
Bwindi’s forest interior and the bamboo zones of the Virunga volcanoes both filter sunlight dramatically, often reducing available light to a fraction of what a standard daylight exposure calculation would assume, even at midday on a clear day. Overcast conditions, common throughout much of the year in this equatorial highland region, reduce light further still. Gorillas also tend to favor shaded resting spots precisely because of the heat, meaning your best photographic subject is frequently positioned in the darkest available patch of forest rather than a convenient, well-lit clearing. Accepting this reality before you start shooting helps you commit to the settings needed rather than fighting the conditions with choices better suited to bright daylight photography.
ISO: Your Primary Tool in the Forest
In gorilla photography, high ISO is not a compromise, it is the primary tool that makes handheld, flash-free images possible at all. Modern cameras, particularly full-frame bodies released within the past several years, handle ISO settings of 3200 to 6400 remarkably well, producing images with manageable noise that cleans up effectively in post-processing. Do not hesitate to push ISO well beyond what feels comfortable in ordinary daylight photography; a slightly noisy but sharp, well-exposed image of a gorilla’s face is far more valuable than a cleaner but blurred or underexposed frame. Shooting in RAW format rather than JPEG gives significantly more flexibility to manage noise and recover shadow detail afterward, and it is worth treating RAW capture as non-negotiable for a shoot this important and this unrepeatable.
Setting Auto ISO With a Minimum Shutter Speed
Many photographers find Auto ISO with a set minimum shutter speed the most practical approach for gorilla trekking, since lighting conditions can shift dramatically within seconds as a gorilla moves between shade and a small patch of filtered sunlight. Setting Auto ISO with a minimum shutter speed of around 1/250th of a second allows the camera to adjust ISO automatically to maintain that shutter speed as light changes, freeing you to concentrate on framing and timing rather than constantly recalculating exposure by hand while a moment unfolds in front of you.
Aperture: Go as Wide as Your Lens Allows
Shooting with your lens’s widest available aperture, ideally f/2.8 or wider if your equipment allows it, maximizes the amount of light reaching the sensor and helps separate your subject from a often cluttered, visually busy forest background. A wide aperture does narrow your depth of field considerably, which matters when photographing a gorilla at close range, so pay careful attention to focusing precisely on the eyes, the detail viewers instinctively connect with in any primate portrait. If you are working with a variable-aperture zoom lens that narrows significantly at longer focal lengths, be aware that your effective light-gathering ability drops as you zoom in, sometimes requiring a corresponding increase in ISO to compensate.
Shutter Speed: Balancing Sharpness and Light
Gorillas move more than most photographers expect, even during seemingly calm moments of feeding or resting, and juveniles in particular rarely stay still for long. A shutter speed of at least 1/250th of a second is a reasonable general minimum for a resting adult, while active behavior, play, feeding, or any movement through vegetation benefits from 1/500th or faster to avoid motion blur. Image stabilization, built into many modern lenses and camera bodies, helps compensate for handheld camera shake at slower shutter speeds, but it does nothing to freeze a moving subject, meaning stabilization and adequate shutter speed solve two entirely different problems and both need to be addressed together.
Shooting Mode: Aperture Priority or Manual
Aperture priority mode, letting the camera calculate shutter speed automatically while you control aperture and ISO, works well for photographers who want to react quickly without manually adjusting every setting between shots. Experienced photographers comfortable with manual exposure often prefer full manual control combined with Auto ISO, giving deliberate control over both aperture and shutter speed while letting the camera handle exposure through ISO adjustment alone, a setup particularly well suited to the fast-changing light conditions typical of forest photography.
Focus Settings for Moving Subjects
Continuous autofocus, sometimes labeled AI Servo or AF-C depending on your camera brand, tracks a moving subject far more reliably than single-shot autofocus, which is essential given how frequently gorillas shift position even during otherwise calm moments. Many cameras now offer dedicated eye-detection autofocus for animals, a feature genuinely useful for gorilla photography given how much a sharp, well-focused eye elevates a primate portrait. Back-button focus, separating the focus trigger from the shutter button, gives experienced photographers more precise control over exactly when and what the camera focuses on, particularly useful when a gorilla is partially obscured by foliage and the camera’s automatic subject detection might otherwise lock onto the wrong element in the frame.
Lens Choice and Practical Handling
A moderate telephoto zoom in the 70-200mm range with a constant f/2.8 aperture is a popular choice for gorilla trekking, offering enough reach for a full-body shot while staying wide enough for closer portrait work when a gorilla approaches nearer than the standard seven-meter guideline occasionally allows. A wider lens, in the 24-70mm range, is worth carrying as well, particularly for capturing the broader forest environment or unexpectedly close encounters. Tripods are impractical in dense forest terrain and generally discouraged during the trek itself, but a lightweight monopod, or simply bracing against a tree trunk or your own knee, can add useful stability when shooting at a slower shutter speed than you would normally choose.
White Balance and Managing Forest Color Cast
Dense forest canopy filters light through green foliage, often producing a subtle but persistent green or yellow color cast that can throw off a camera’s automatic white balance, sometimes leaving gorilla fur looking slightly off in tone straight out of the camera. Shooting in RAW format again proves valuable here, since white balance can be corrected freely during editing without any loss of image quality, unlike JPEG files where white balance adjustments are more limited. Photographers who prefer to fine-tune settings in the field can set a custom white balance using a neutral gray or white reference object, though given how quickly a gorilla encounter unfolds, most experienced photographers simply shoot RAW and address white balance during post-processing rather than spending precious trekking time on in-camera calibration.
Post-Processing Considerations
Noise reduction software has improved dramatically in recent years, and images shot at ISO 3200 or even 6400 that might have looked unusably grainy a decade ago can now be cleaned up effectively using modern editing tools, recovering both detail and color accuracy while suppressing digital noise. Shooting RAW gives you the flexibility to apply this kind of correction without the quality loss JPEG compression introduces, reinforcing why RAW capture is worth the extra storage space and processing time for a shoot this significant. It is worth reviewing your images each evening during a multi-day safari rather than waiting until you return home, both to confirm your settings are working as expected and to identify any technical issues, like a slightly soft focus point or unwanted motion blur, early enough to adjust your approach on a subsequent trekking day if your itinerary includes more than one.
A Note on Flash and Ethical Practice
Flash photography is strictly prohibited during gorilla encounters across Uganda, Rwanda, and DR Congo, a rule enforced to prevent startling the animals and to avoid any risk of eye damage from repeated close-range flash exposure. Every setting discussed here assumes flash-free, ambient-light shooting as the only acceptable approach, and any photographer arriving with hopes of using flash to compensate for difficult light should plan instead around the high-ISO, wide-aperture techniques covered above. Our companion guide on how to photograph gorillas ethically without flash covers the reasoning and rules behind this policy in more detail.
Practicing Before You Go
Because you will have only one hour, and often considerably less usable time once accounting for movement and positioning, practicing these settings before your trip pays real dividends. Spend time before departure shooting handheld in low-light conditions at home, testing how your specific camera body performs at higher ISO settings and how comfortable you feel adjusting exposure quickly without looking away from the viewfinder. Arriving at your trek in Bwindi Impenetrable National Park or Rwanda’s Volcanoes National Park already comfortable with your settings means spending your limited time with the gorillas actually watching and composing, rather than fighting with camera menus during the encounter of a lifetime.